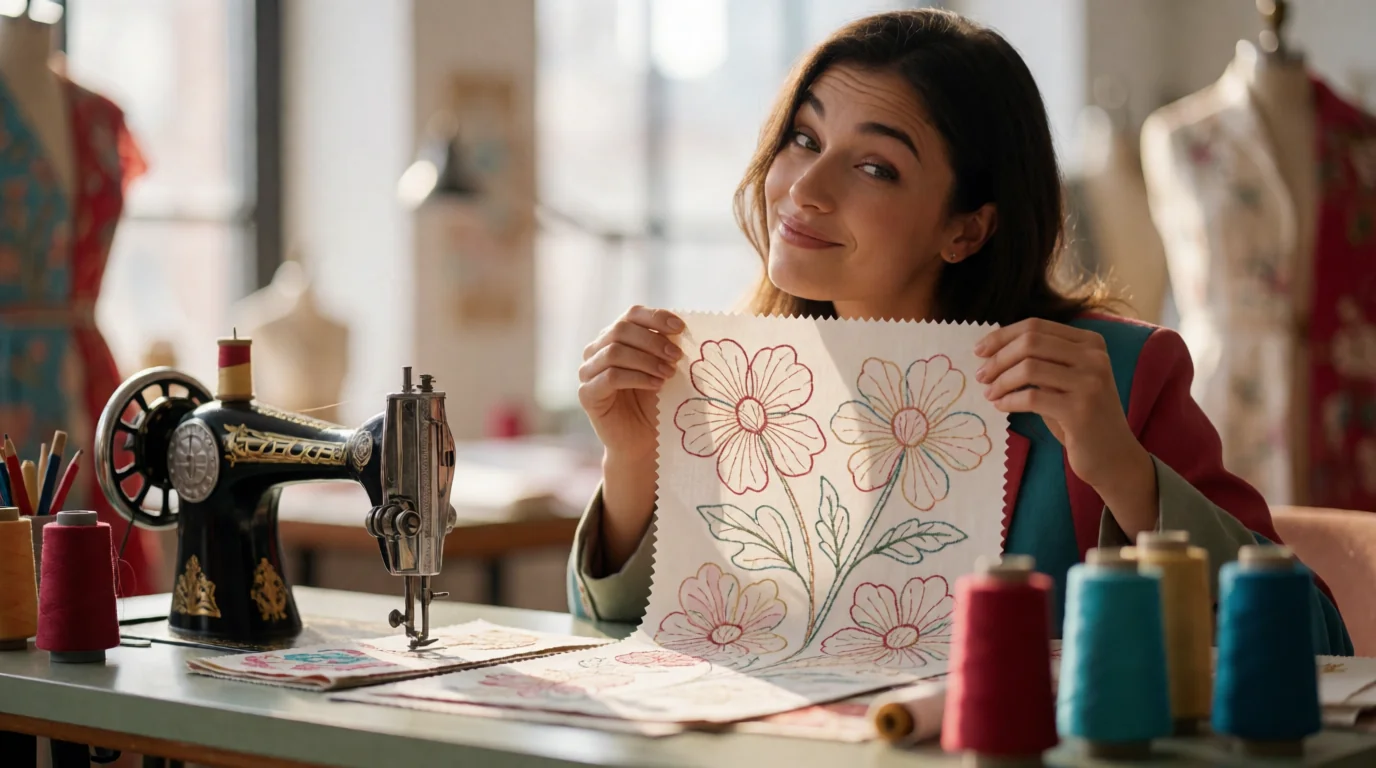

A JPG may be ready for a website, flyer, or social media post, but embroidery machines need something very different. If you want to convert jpg to pes, you are not simply changing a picture into another file type. You are turning artwork into stitches, and that means the quality of the original image, the software, and the digitizing choices all matter. A good embroidery file formats guide can explain the file types, but the real question is what happens between the artwork and the final stitch file.
I have worked with enough embroidery artwork to know that the cheapest method is not always the quickest one. A simple logo may need only a few adjustments, while a detailed badge with small lettering can take much more attention. In 2026, free tools, desktop software, online services, and professional digitizing all have their place. The trick is knowing which one fits the design in front of you.
What to Know Before You Convert a JPG to PES

Before choosing a tool, look at the artwork itself. A clean, simple logo gives automatic software much better information than a blurry screenshot with several shades and tiny details.
Why JPG Isn't Embroidery-Ready on Its Own
JPG is a bitmap image made from pixels. It tells your computer what the picture looks like, but it does not tell an embroidery machine where to place stitches.
For example, a red circle in a JPG does not contain instructions such as:
- Use a satin stitch around the edge.
- Fill the center with a specific stitch pattern.
- Start stitching from this point.
- Change direction here.
- Leave this area open.
- Add underlay beneath this section.
Those decisions have to come from embroidery software or a digitizer.
The quality of the JPG matters, too. Wilcom's 2026 documentation notes that auto-digitizing results depend heavily on the quality and type of the original artwork. It also points out that vector graphics maintain image quality when resized, while bitmap images can lose quality when enlarged or reduced.
That is why I usually look at the artwork before I even think about the conversion method. If the source image already has rough edges, missing details, or too many colors, the software has a harder job from the start.
What Makes a PES File "Machine Ready"
A usable embroidery file needs more than the right extension.
The design needs sensible stitch types, stitch directions, density, object order, color changes, and spacing. It also needs the correct size for the hoop and machine.
PES is associated with Brother embroidery systems, but compatibility still depends on the specific machine and software. A file can open successfully and still need changes before stitching.
This is an important difference between a file that opens and a file that stitches well.
Best Free Ways to Convert JPG to PES in 2026

Free options have improved, and they can be useful for beginners and simple designs. They work best when you understand their limits instead of expecting them to make every embroidery decision for you.
Free Auto-Digitizing Software Options
Some free or trial-based embroidery programs can trace artwork and turn it into embroidery objects.
These tools can be useful for:
- Simple one color logos
- Large lettering
- Basic shapes
- Practice designs
- Learning how embroidery objects work
The result still needs inspection.
Automatic tracing may create too many small objects around a curved edge. It can also assign a stitch type that does not suit the shape.
For a basic logo, you may get a useful starting point. For a detailed emblem, you may spend more time correcting the automatic result than you expected.
Online JPG to PES Converter Tools
Online tools can seem attractive because you do not need to install large software. If you are searching for a jpg to pes converter free, you will find plenty of browser based options that claim to handle the conversion in just a few clicks.
The basic process usually looks simple:
- Upload the artwork.
- Select an embroidery format.
- Choose the size or other settings.
- Process the file.
- Download the result.
That convenience can work for simple artwork.
However, you should check what the service actually does. Some websites focus mainly on file conversion, while others perform some level of automatic digitizing. Those are not the same thing.
A genuine digitizing process has to create stitch information from the artwork. A basic format conversion cannot magically create good stitch planning from a JPG.
Built-In Conversion Features on Some Embroidery Machines
Some embroidery ecosystems include software that can turn imported artwork into embroidery data.
Brother's PE-DESIGN 11, for example, includes enhanced Auto Punch features that trace artwork and create embroidery patterns. Brother also lists a Fabric Selector and Intelligent Color Sort among the software features.
This can be useful if you already work inside the Brother software environment.
The important point is that automatic conversion still gives you a design to inspect. Brother's own instructions for image-to-embroidery conversion involve importing an image, using Auto Punch, and creating an embroidery pattern.
That does not remove the need to check the result.
Limitations You'll Run Into With Free Methods
Free methods make the most sense when the design itself is forgiving.
You may run into problems with:
- Small lettering
- Thin outlines
- Detailed artwork
- Photographs
- Gradients
- Many color changes
- Very narrow shapes
- Overlapping objects
- Stretchy fabrics
- Designs that need exact sizing
Wilcom's current auto-digitizing documentation makes a similar point: clean artwork with sharp edges and limited colors works better, while poor artwork may need manual adjustment. It also notes that automatic settings for underlay, density, and pull compensation should be checked for the intended fabric.
That is a pretty good rule to keep in mind: the simpler and cleaner the artwork, the more useful automatic conversion becomes.
Best Paid Ways to Convert JPG to PES in 2026

Paid methods make more sense when the design matters, the details are difficult, or you need consistent results across several pieces.
Professional Digitizing Software (Wilcom, Hatch, and Others)
Professional embroidery software gives you much more control than a basic online converter.
Wilcom EmbroideryStudio 2026, for example, includes automatic digitizing as well as tools for editing stitch types, sequencing objects, adjusting underlay, and working with pull compensation. Its current documentation also recommends editing auto-digitized results rather than treating the first result as final.
That control matters when a design contains several different elements.
You can decide whether a section should use:
- Satin stitching
- Tatami or other fill stitching
- Running stitches
- Different stitch directions
- Different densities
- Separate underlay settings
Hatch and other professional embroidery programs follow the same general idea: automatic tools can speed up the first stage, while manual editing gives you greater control over the finished design.
Paid Auto-Digitizing Tools With More Control
Not every paid tool requires you to digitize every stitch by hand.
Some paid programs combine automatic tracing with editing features. That middle ground can work well for someone who handles a steady flow of straightforward logos.
Wilcom's 2026 software, for instance, can automatically determine colors, fills, outlines, and stitch types from imported artwork, then gives the user tools to edit the result and optimize object sequencing.
This is where paid software can save time. You get automation without giving up all control.
Still, I would never skip the editing stage just because the software has a strong auto-digitizing feature.
Free vs Paid Conversion: Side-by-Side Comparison
The right method depends on the design, but a simple comparison helps.
Accuracy and Stitch Quality
Free methods: Good starting point for clean, simple artwork.
Paid software: More control over stitch structure, density, sequencing, and editing.
Professional digitizing: Best choice when the design needs careful manual decisions.
Time Investment
A free tool costs little money, but correction time can add up.
Paid software takes an initial investment and some learning, but regular users can work faster once they understand the controls.
A professional service costs money per design but saves the learning time and editing work.
Cost Over Multiple Designs
If you only need a few simple hobby designs, a free method can make sense.
If you create designs regularly, paid software may become more practical because you can reuse your skills and settings.
For occasional complex artwork, paying a digitizer can make more financial sense than buying software that you may rarely use.
Which Method Fits Your Project

There is no single best choice for every JPG. The design itself should guide the decision.
Best Option for Simple Logos and Hobby Projects
Start with a free or trial-based auto-digitizing tool if your artwork has:
- Large shapes
- Few colors
- Clear edges
- No tiny lettering
- Little overlap
A simple practice logo can teach you a lot about how artwork changes once it becomes embroidery.
Just check the result before using valuable garments or fabric.
Best Option for Detailed Designs and Small Text
Paid software or a professional digitizer makes more sense here.
Small text can close up. Thin lines can disappear. Tight curves can lose their shape. A human can make practical decisions about what to simplify and what to keep.
This is one area where trying to save a few dollars can cost more time than expected.
Best Option for Bulk or Commercial Embroidery Orders
For repeated orders, consistency matters.
If you regularly handle logos for shirts, caps, jackets, uniforms, or promotional items, professional software gives you more control over your files.
A professional digitizing service can also make sense when you have many designs but do not want to manage the software work yourself.
Step-by-Step: Getting a Clean PES File Every Time

Preparing Your JPG Before Conversion
Start with the cleanest artwork you have. Before you convert jpg to pes format, check the image carefully instead of sending the first JPG you find directly into the software.
Before importing it, check:
- Image resolution
- Background
- Number of colors
- Edge quality
- Text size
- Overall dimensions
- Unwanted shadows or effects
Remove unnecessary background elements. If you have access to the original vector artwork, use that instead of a small JPG whenever possible.
Clean artwork gives the digitizing software a much better starting point.
Choosing the Right Method for Your Design
Now look at the level of detail.
A simple badge may work with automatic software.
A detailed company logo with small lettering deserves more control.
A complex mascot, jacket-back design, or multi-size logo may justify professional digitizing from the beginning.
Do not choose the tool based only on whether it says "free."
Choose it based on how much judgment the design needs.
Testing the Stitch-Out Before Final Production
This step catches problems that a computer screen cannot show.
Stitch the design on fabric similar to the final material and check the result closely.
Look at:
- Letter clarity
- Edge smoothness
- Thread coverage
- Fabric pulling
- Stitch density
- Registration between colors
- Overall size
- Shape of small details
If something looks wrong, correct the embroidery file before using it on the final item.
I have learned that a five-minute test can save much more time than fixing several finished garments later. It is a simple habit, but it makes a real difference.
FAQs
What's the best free way to convert JPG to PES in 2026?
For a simple logo, a free auto-digitizing or trial-based embroidery program can be a practical starting point. Choose clean artwork with clear shapes and few colors, then inspect and test the resulting stitches before using the design on a finished item.
Is paid embroidery digitizing worth it for a single logo?
Yes, when the logo contains small text, fine details, several overlapping areas, or needs to look consistent at a specific size. For a very simple logo, free software may be enough. The amount of correction needed should guide the decision.
Can I convert JPG to PES without any digitizing software?
You can use an online service that creates an embroidery file from your artwork, but you still need a process that interprets the image as stitches. Simply renaming a JPG file does not create embroidery instructions.
Which method gives the cleanest stitch quality for detailed designs?
For detailed artwork, professional manual editing usually gives the strongest control. Auto-digitizing can provide a useful starting point, but detailed designs normally need adjustments to stitch type, direction, density, underlay, sequencing, and small features before stitching.
Author Bio
Matthew Davis
Senior Embroidery Digitizer
I'm Matthew Davis, a skilled embroidery digitizer with more than 15 years of practical experience. I specialize in logo digitizing, 3D puff embroidery designs, applique digitizing, custom embroidery digitizing, and working with difficult fabrics.
Over the years, I have worked with different fashion brands and production teams worldwide. I always share simple tips and useful techniques to help both beginners and businesses improve their embroidery work.

Responses (0)
Join the conversation
Sign in to share your thoughts and talk with the author.
Sign in to respondNo responses yet. Be the first to share your thoughts!